No Discard Sourdough Starter
Are you looking to start your first Sourdough Starter? Maybe you want to try a different method of making your starter. I love how low-maintenance the No Discard Sourdough Starter is. I don’t have to worry about keeping up with the discarded starter or wasting ingredients and tossing it out.
Don’t Stress – If you are new to sourdough it can seem a bit overwhelming, but trust me I was confused at first and now it all makes more sense. Hang in there and don’t be afraid to experiment with it and have fun. I’ve learned from plenty of mistakes and failures.
Food for thought – I made my first sourdough starter with the discard method and although it worked it seemed strange to me that you would throw away half the starter or have to make something out of it. I couldn’t imagine the gold miners back in the day wasting food or having the time to make other baked goods so they could use up discard. Granted they probably had a well-maintained starter for years but still they were frugal and used everything back then. I purchased a sourdough cookbook from the 80s and they never mention discarding or throwing part of it out before feeding.
Low maintenance – If you don’t need a lot of bread then you can choose to keep the starter in the refrigerator and feed it a little flour once a week until you need it for bread. Set it out the night before and feed it or a few days before and let it activate again.
Making a no-discard starter
Day 1: I mixed 1 tablespoon of the all-purpose flour and 1 tablespoon of room temperature filtered water in a small, clean, glass container with a spoon. ( you could also use plastic) The narrow handle of a wooden spoon worked well since it was such a small amount. I used a pint jar to mix mine in. Loosely set the lid on top or cover it with plastic wrap or a coffee filter with a rubber band to keep it in place. I have heard you don’t want to screw on a jar lid, this could result in it exploding out of the top. Leave it set out on your countertop for 24 hours. Mine has always done better when it is kept in a warmer area in my house.
Day 2: After 24 hours I added 1 tablespoon of all-purpose flour and 1 tablespoon of room-temperature filtered water to the starter mixture. Mix and scrape down the sides of your jar with a rubber scraper. Cover again loosely and set out for another 24 hours.
Day 3: After 24 hours mix in 1 tablespoon of all-purpose flour and 1 tablespoon of filtered room-temperature water and mix and scrape down the sides with a rubber scraper. Loosely cover to set for another 24 hours
Day 4: Mix 1 tablespoon of all-purpose flour and 1 tablespoon of filtered room-temperature water into the starter. Mix, scrape down the sides, loosely cover, and leave out for another 24 hours. Mine started to get runny at this stage, and I added 1/2 tablespoon of extra flour to thicken it up. If your starter starts forming lots of liquid on the top this is called hooch, this can be a sign your starter is hungry and needs more flour.
Day 5: Over the last four days we have slowly mixed 4 tablespoons of flour and 4 tablespoons of water resulting in roughly half a cup of starter. Now we will need to up the amount of flour and water we feed it to meet the demand of the bacteria in the starter needing to eat. At this stage, I mixed in 1/4 cup of flour and 1/4 cup of water.
Day 6: I mixed 1/4 cup flour and 3 tablespoons water to make it a thick pancake batter-like consistency. I play it by ear and add water depending on how runny or thick the starter is.
Day 7: I mixed in 1/4 cup flour and 1/4 cup water, and let set 24 hours loosely covered.
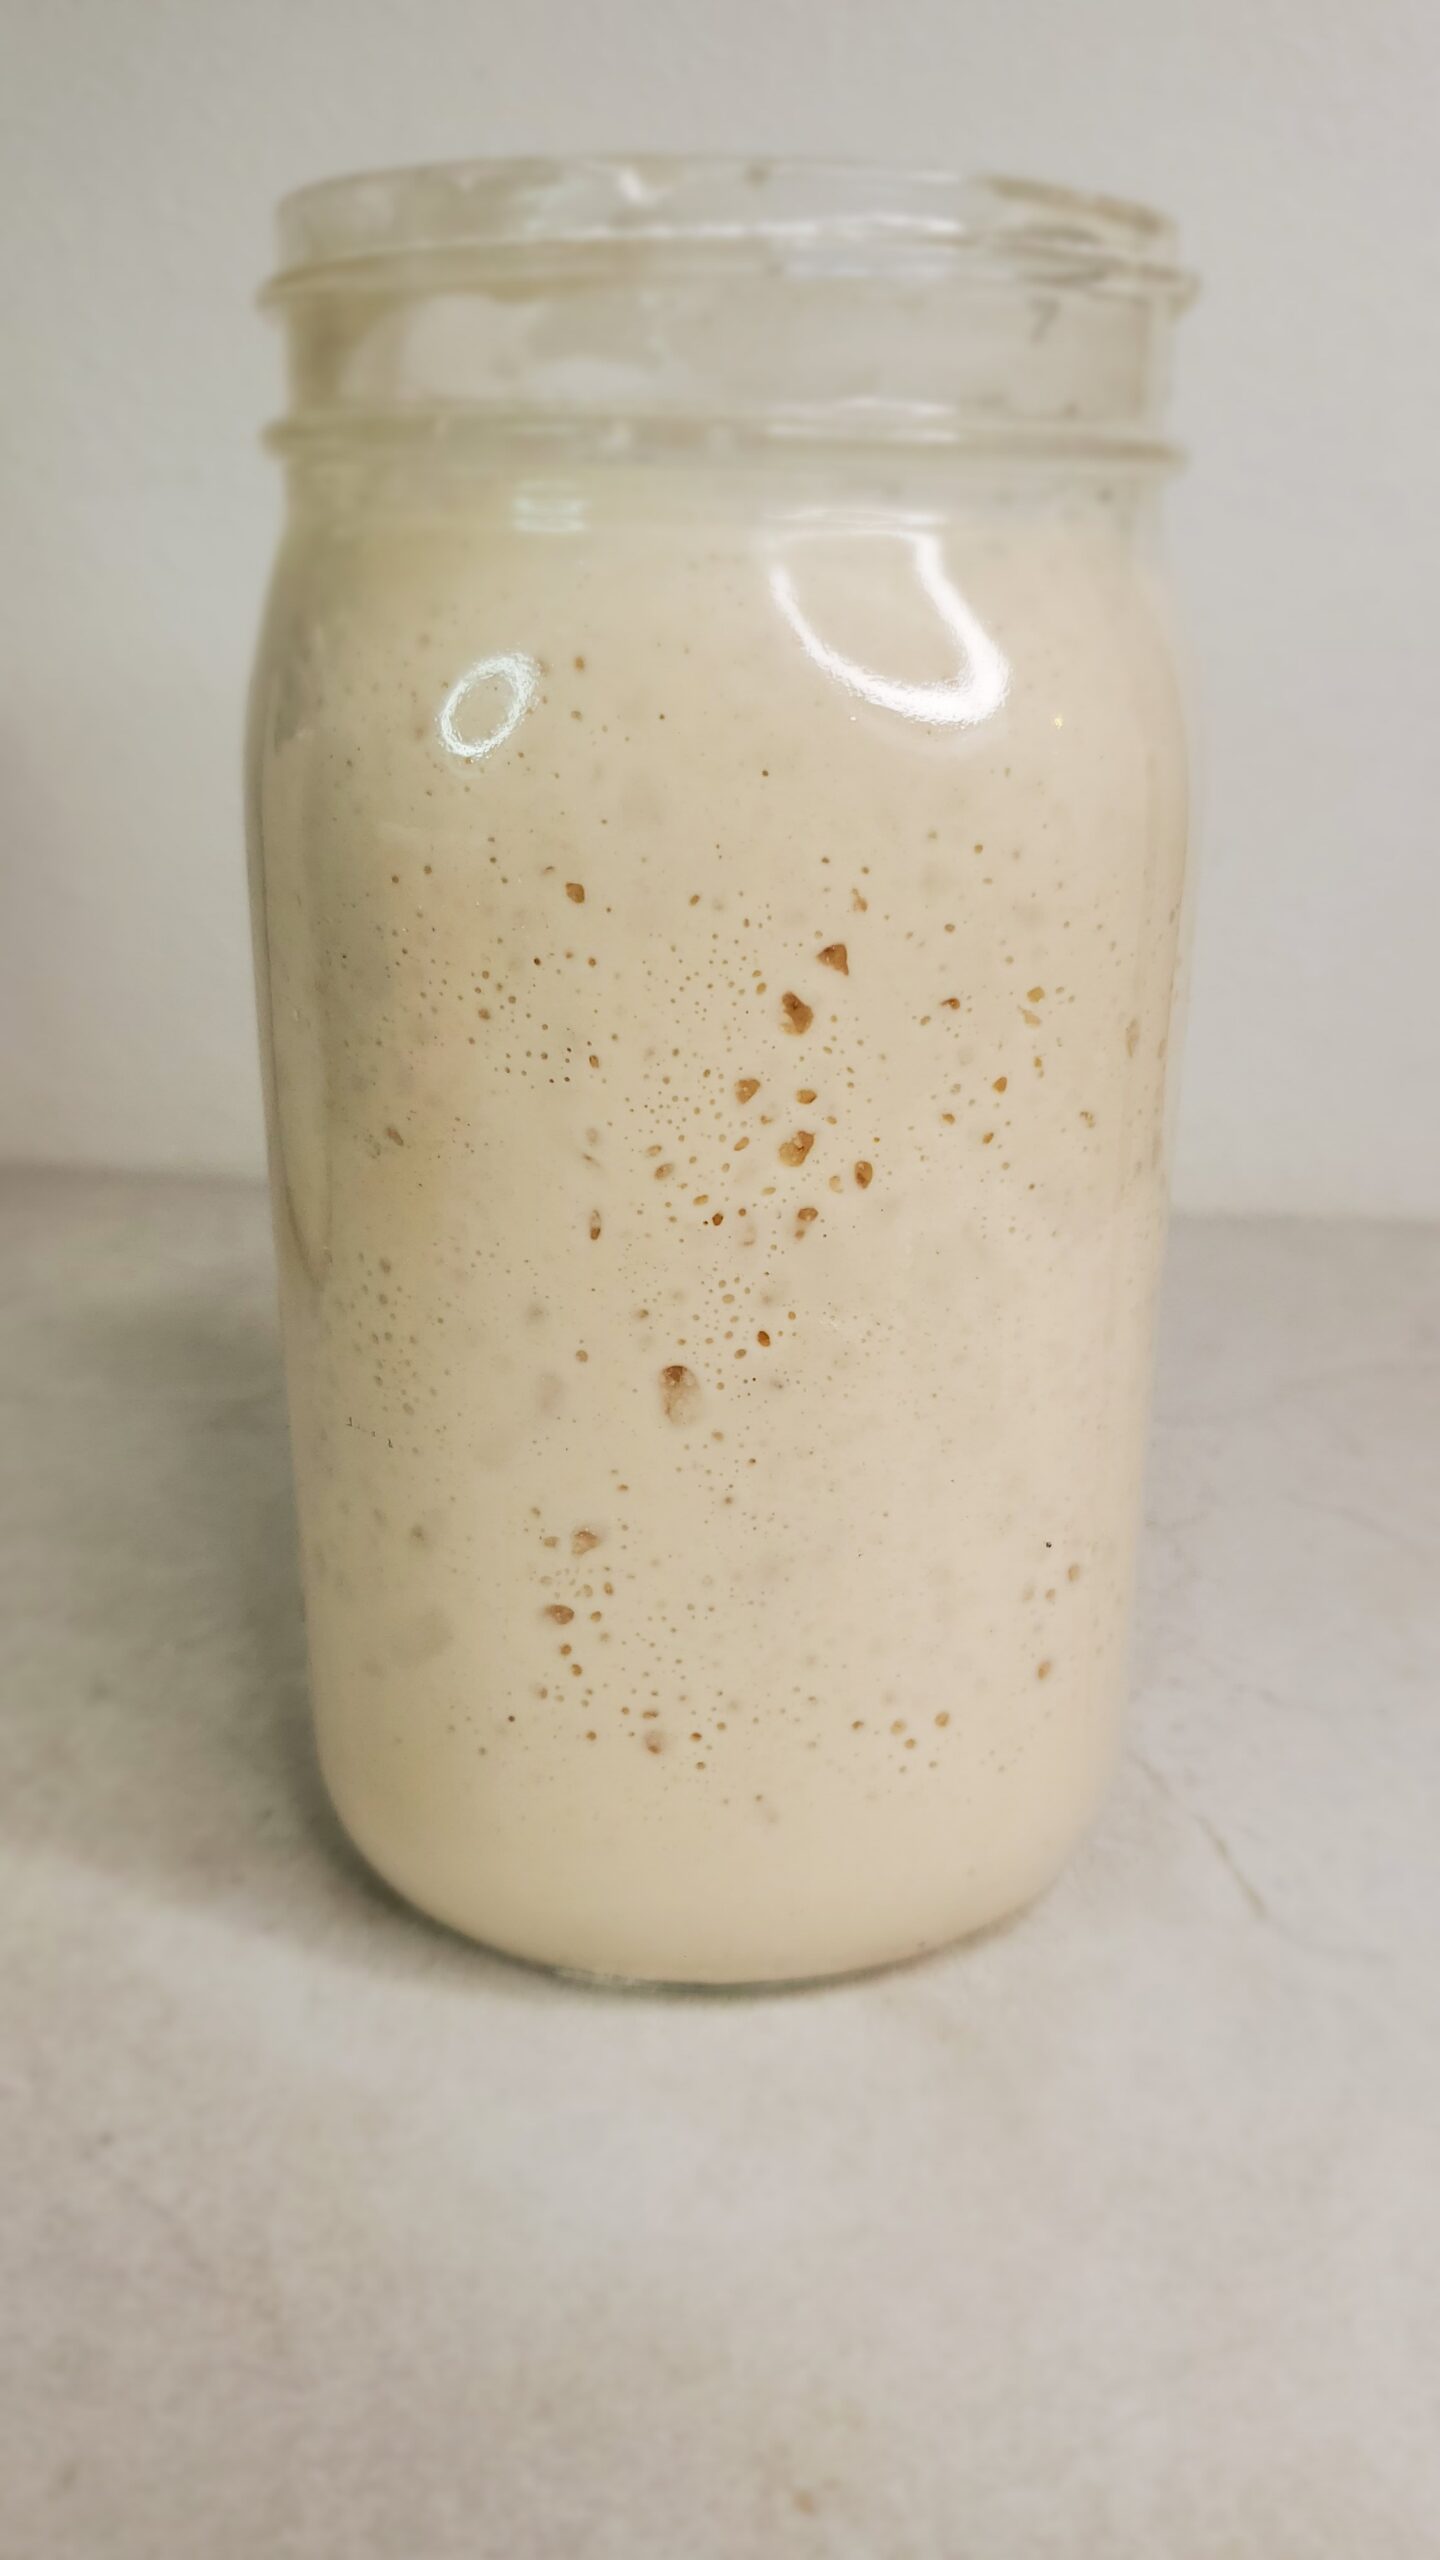
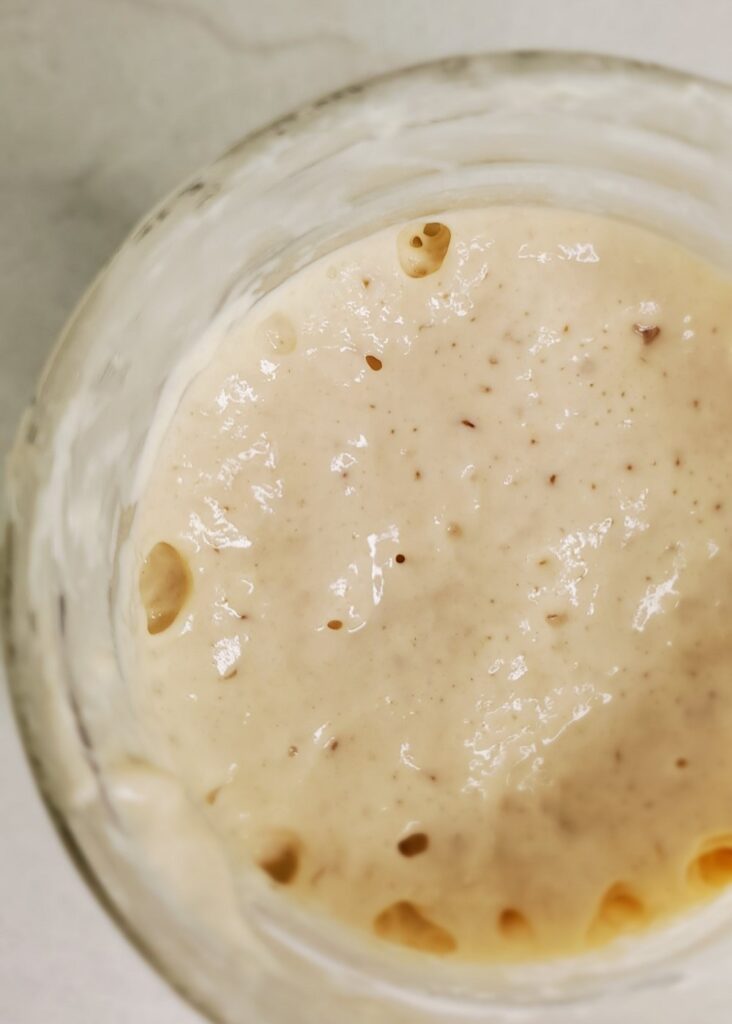
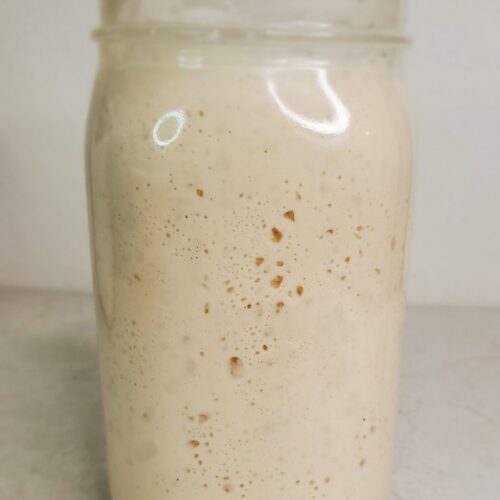
Day 8: I mixed in 1/3 cup flour and 1/4 cup water. After 2 hours of rising, it had grown to almost double in size and was bubbly or active and ready to use. I poured off the amount I needed for my recipe and refed the remaining starter left in the jar equal parts of water and flour. I returned the remaining starter that I fed to the counter.
Maintaining your Starter- Once the starter is established, you can leave the starter out on the counter at room temperature and start a feeding schedule every 12- 24 hours. I feed my starter a 1:1 ratio (1 cup starter. 1 cup room-temperature water, 1 cup flour) This works best if you are going to be using it often. However, you will quickly acquire a lot of starter at this rate if you are not using it every day.
If you would like to keep the no discard method going you can keep it in the refrigerator until you are ready to bake. Set it out a couple of days before you are ready to use it and again feed it equal parts flour and water. ( I keep a cup of starter in the refrigerator so I feed it 1 cup of water and 1 cup of starter.) You can use it after it has become active and bubbly. Then repeat the process of using what you need for baking, feed it, let it become active, and then stick it back in the refrigerator.
I recommend feeding starter stored in the refrigerator once a week to maintain its health. Bring it out of the refrigerator and feed it 2 TB of flour and enough water (if it needs it)to make a thick pancake batter consistency. Let it reach room temperature so the yeast can start to feed on the flour and then back in the refrigerator it can go.
Also, it may form what is known as hooch on the top ( a clear yellowish liquid) you can choose to pour that off or stir it back in when you are feeding it. I stir mine back in, it’s really a personal preference.
Notes: This process may take more or less days depending on many factors. Like the types of flour you use or the temperature of your house. If your starter is not ready to go in 8 days don’t sweat it. I have made a total of five starters now experimenting and they range from 8-15 days for them to get to the point where they will rise and double in size. The amount of flour you feed a starter will also affect when it starts activating. My sister just made her first starter and it only took hers 3 days to double in size! She used bread flour to start hers. Also, I have heard from some that using freshly milled flour can create a stronger starter and grow faster.
No Discard Sourdough Starter
Ingredients
- 2 1/4 c All-purpose flour You may need more depending on how the starter looks day to day.
- 2 1/4 c Filtered Water You may need more or less depending on how the starter looks day to day.
Instructions
- Day 1: Mix 1Tablespoon of the all-purpose flour and 1 Tablespoon of room temperature filtered water in a clean glass or plastic container with a narrow wooden spoon or the handle of a wooden spoon works well too. I used a pint jar to mix mine in. Loseley set the lid on top or cover it with plastic wrap or a coffee filter. Using a rubber band helps to keep it in place. Leave it set out on your countertop, or on top of your refrigerator where it gives off warmth. I have placed mine in the microwave with the door propped open so the light gives off extra warmth. Mine has always done better when it is kept in a warm place.
- Day 2: After it has been 24 hours add 1 tablespoon of all-purpose flour and 1 tablespoon of room-temperature filtered water to the starter mixture in your jar. Mix this well and scrape down the sides of your jar with a rubber scraper. Cover again loosely and set out for another 24 hours.
- Day 3: Add 1 tablespoon of all-purpose flour and 1 tablespoon of filtered room-temperature water and mix well. Scrape down the sides again with a rubber scraper and loosely cover to set for another 24 hours.
- Day 4: Again mix in 1 tablespoon of all-purpose flour and 1 tablespoon of filtered room-temperature water. Mix, scrape down the sides, loosely cover, and leave out for another 24 hours. Here is where mine started to get more runny and I added an additional 1/2 tablespoon of flour to thicken it up. If your starter starts forming lots of liquid on the top this is called hooch which simply means your starter is hungry and needs more flour.
- Day 5: Over the last four days we have slowly mixed 4 tablespoons of flour and water together resulting in roughly half a cup of starter. Now we will need to up the amount of flour and water we feed it to meet the demand of the bacteria in the starter needing to eat. Add-in 1/4th cup of flour and 1/4th cup of water.
- Day 6: I mixed 1/4 cup flour and 3 tablespoons water to make it a thick pancake batter-like consistency. I play it by ear and add water depending on how runny or thick the starter is.
- Day 7: I mixed in 1/4 cup flour and 1/4 cup water, and let set 24 hours loosely covered.
- Day 8: I mixed in 1/3 cup flour and 1/4 cup water. After 2 hours it had grown to almost double in size and was bubbly and ready to use. I was able to use a cup for my recipe and feed the remaining starter for later. Keep in mind it may take a few days more or less depending on all kinds of factors like the flour you use the temperature in your house etc.
- Maintaining your Starter- Once the starter is established, you can leave the starter out on the counter at room temperature and start a feeding schedule every 12- 24 hours. I feed my starter a 1:1 ratio (1 cup starter. 1 cup room-temperature water, 1 cup flour) This works best if you are going to be using it often. However, you will quickly acquire a lot of starter at this rate if you are not using it every day.If you would like to keep the no discard method going you can keep it in the refrigerator until you are ready to bake. Set it out a couple of days before you are ready to use it and again feed it equal parts flour and water. ( I keep a cup of starter in the refrigerator so I feed it 1 cup of water and 1 cup of starter.) You can use it after it has become active and bubbly. Then repeat the process of using what you need for baking, feed it, let it become active, and then stick it back in the refrigerator.I recommend feeding starter stored in the refrigerator once a week to maintain its health. Bring it out of the refrigerator and feed it 2 TB of flour and enough water (if it needs it)to make a thick pancake batter consistency. Let it reach room temperature so the yeast can start to feed on the flour and then back in the refrigerator it can go. Also, it may form what is known as hooch on the top ( a clear yellowish liquid) you can choose to pour that off or stir it back in when you are feeding it. I stir mine back in, it's really a personal preference.


On day 8 you said you took out a cup for your recipe and you fed the remaining starter for later, but you don’t say how much you fed it. Also, how much going forward do you feed it?
Hello Donna,
This is a great question, thank you for bringing this to my attention. I will add that to my post. I would take however much you have left and feed it equal parts water and flour. You can leave it on the counter at room temperature and feed it every 12-24 hours. Each time you feed it, feed it a ratio of 1:1 (equal parts water and flour). This works best if you are going to be using it often. However you will quickly acquire a lot of starter at this rate if you are not using it every day.
If you would like to keep the no discard method going you can keep it in the refrigerator until you are ready to bake. Set it out a couple of days before you are ready to use it and again feed it equal parts flour and water. ( I keep a cup of starter in the refrigerator so I feed it 1 cup of water and 1 cup of starter.) You can use it after it has become active and bubbly. Then repeat the process of using what you need for baking, feed it, let it become active, and then stick it back in the refrigerator.
I recommend feeding starter stored in the refrigerator once a week to maintain its health. Bring it out of the refrigerator and feed it 2 TB of flour and enough water (if it needs it)to make a thick pancake batter consistency. Let it reach room temperature so the yeast can start to feed on the flour and then back in the refrigerator it can go. I have found it doesn’t need a lot of flour for maintenance while it is in the refrigerator just enough to give it a little fuel so to speak.
Also, it may form what is known as hooch on the top ( a clear yellowish liquid) you can choose to pour that off or stir it back in when you are feeding it. I stir mine back in, it’s really a personal preference.
I hope this helps. Please let me know if you have any other questions. Happy Baking! – Katie
Quick question: you mentioned it might take a day or two for the starter to double in size. Do you continue feeding it flour and water until it doubles in size? And if so, how much flour and water?
Hello Sarah,
Good question! I would keep feeding it every 24 hours in equal amounts of flour and water. Also, I found fanning your starter twice a day helps the starter pick up more microorganisms (wild yeast) from the air, without drying it out of course. Hope that helps! – Katie 🙂
My starter is on day 3 and is already starting to have bubbles and a somewhat sour smell. Is this normal?
Hey Judy,
Yes, that is normal, around day 3 you can have what they refer to as a false rise, likely from gases created by bacteria. Bubbles and a sour smell are a good sign it’s working, I would keep feeding it and let it continue to build more strength.- Katie
Thank you for this uncomplicated starter recipe! My only question; I’m on day 8 now, if it doesn’t double after todays feeding, what measurements would you proceed with until it does double after the feeding?
You are welcome Alaina! This is a great question, I would continue to feed the starter every 24 hours equal parts water and flour. Because the starter and water is heavier then flour say you have 1 cup of starter I would feed it 1 cup of water and 1 1/2 cups of flour. Hope that helps! – Katie 🙂
I’m on day 1 but I have a couple questions. If I keep my starter in the fridge and want to keep it active, how often do I feed it? Do I just feed it when I take it out of the fridge and want to use it? If I wasn’t going to use it for 2 weeks or so I want to make sure it doesn’t go bad! Thanks!
Hey Shayla,
Once your starter is established, and if you choose to store it in the refrigerator, it is recommended to feed it once a week to keep it active, healthy, and strong. However, I keep mine in the refrigerator and only take it out and feed it the day before I want to bake to let it get active again. Sometimes it goes a month or two before I feed it. The longest I think I went was about 9 months, it had a large amount of hooch on it (a dark, watery liquid), and it had become very acidic, so it required a couple of feedings at room temperature before it was fully active again and I could use it to bake with. You run the risk of it going bad or growing mold, leaving it in the refrigerator for that long. If you plan on going a really long time without using it, drying your starter is a great option. I always keep dried starter on hand just in case. It takes a few days to reactivate, but it will avoid the risk of it spoiling. Always check it for mold or pinkish/orange streaks on the top, which is a sign that it has bad bacteria and should be thrown out.
Wishing you many great loaves of bread, and a strong, successful starter- Katie 🙂
Looking forward to this sourdough bread! Thanks again!
If your starter is “hungry” or water (with hooch I believe) can I just add a tbsp or so of flour? No need to add water, right?
Yes, you can feed your starter a tablespoon of flour every week to keep it healthy (to clarify for anyone reading, if it’s being kept in the refrigerator). I used to do it that way and would add water if it started getting too thick. Sometimes I don’t even do that anymore. I currently have a couple of different starters in my refrigerator, and sometimes they will sit for weeks/months without being fed. It can take a couple of feedings to revive them before baking after sitting that long.
Hi Katie,
I’m now on day 8 of the guideline above, and I don’t see my starter rising. I’ve used 00 flour – new batch from the store. The starter is thick, pancake consistency, and smells a little funny / wet/ doughy – nothing ‘sour’. I see very few bubbles. I’ve keep the dough in my microwave, with light on for a few hours since it’s about lower than 15degC here in the Netherlands.
I’m not sure if I messed up somehow or if I am way past the point where the starter has spoilt now.
Any tips for me? Anything to salvage the starter now? Thanks so much!
Hello! I would say keep going! 🙂 Every starter can take a different amount of time to be ready. In my environment, my starters are typically active on day 8-9. I had one that took 15 days until it started rising and was active enough to bake with. As far as not discarding, if your starter gets too big, you may need to take some off until it becomes active, that way you don’t have so much to feed. As long as there are no signs of mold, it’s ok to keep going. Hope that helps!
Thanks Katie,
This would mean to continue feeding it in the same proportion as day 8 ?
Appreciate your insights and help already 🙂
Yes keep feeding it a 1:1:1 ratio. So if you don’t want to keep feeding the large amount that is has grown to, downsize it to aroung 25 grams and feed it 25 grams of flour and 25 grams of water. Give or take some to make sure it is a thick pancake batter like consistency. Thank you!:)
When storing in the fridge, should you still keep it covered loosely?
Hey Rachel,
I keep mine with plastic wrap over the top and a rubber band to keep it air-tight. I haven’t had any issues except in my refrigerator for some reason, if I keep my starter on the top shelf it has occasionally grown mold. On the middle shelf and the bottom shelf, I haven’t had any issues with molding. You could also keep them in a container such as a glass Pyrex container with the rubber lid that goes over the top. I have used those as well. I got the 1 cup size and it’s just enough to keep on hand and use when I need. Hope that helps! 🙂
Hey Katie,
I have tried a different sourdough recipe once and it became quite sour smelling. It was so bad smelling that I had to through it away instead of keep discarding/feeding. Is there any way to get it to not smell so bad?
Hey Brynna!
If you are in the process of making a new sourdough starter and it starts to smell “bad” keep feeding it and following the process. A foul smell in the beginning is pretty normal as long as there are no signs of mold. Mold can be pink, orange, greenish, or fuzzy white. It should eventually turn into a yeasty smell. A mature starter can smell acidic or sour when it’s hungry, and that is normal, too. Hope that helps! 🙂
Hi! I am on Day 4 of making starter. Everything seems to be going well, I am seeing bubbles on top but no doubling yet, and there is a lovely sourdough smell to the starter. The only thing I am worried about is that the starter is very firm and elastic, like dough. It’s not soft like pancake batter. Will this change, or do I need to up the amount of water I am adding? So far I have been adding 25g flour and 25g water each day. Thanks!
Hey Heide,
I hope everything turned out all right for you. Yes, I would personally add more water to make it easier to stir. I have heard of stiff sourdough starters that are more like a dough consistency, maybe they do it a little differently with feeding, but I would think your starter is ok, just on the thick side.
-Katie