Basic Sourdough Bread

This recipe is for a basic rustic loaf of sourdough bread. Nothing fancy just simple, sourdough, bread to make and enjoy. This sourdough bread is great toasted with butter and eaten alongside breakfast or soups.
Back in 2020, during the pandemic, standing in the stores with bare shelves, no bread, and no yeast to be found. I decided to learn how to make my own sourdough starter, so I could in turn make my own sourdough bread. It was becoming a popular trend on social media at that time and still is. Sourdough has many health benefits because of the fermentation but now I have so much fun making it and experimenting with it, you could say it’s a bit of an addiction.
I chose to make my sourdough using measurements over a scale to weigh my ingredients, not because I think it’s better one way or the other. Who knows, someday I may switch over to weighing everything out which I’m sure has its benefits, but for now, measurements it is. My goal for this recipe is to make bread to eat and not worry about the perfect loaf or crumb.
Flour – The type of flour you use will have a huge effect on the outcome of your bread. For this recipe, I have used all-purpose flour and bread flour. I used to use the Great Value All-purpose flour for years, and it worked wonderfully. Upon further research, I have switched to King Arthur unbleached all-purpose flour and King Arthur Bread Flour.
I have heard others say using freshly ground flour, has made their starters and breads grow faster. Or using part rye flour has helped boost the strength of the gluten.
Salt- I keep sea salt in my pantry and I use it for all my recipes including this one. Although the smallest ingredients it goes to show the significance of small things. If you forget the salt you will notice, (trust me I know from experience) you will end up with a bland loaf. Salt also helps strengthen the gluten, helping the bread rise.
Water- I use filtered room-temperature water or bottled spring water. It is not recommended to use tap, distilled, or hard water. Using warm water can help boost the activity of your starter. Don’t use water over the temperature of 120 degrees or it can kill the yeast.
Sourdough Stareter- I feed my starter a ratio of 1 cup of sourdough starter to 1 cup of water and 1 1/2 cups of flour and make sure it is active before I use it for this recipe.
Let’s make some sourdough! For this recipe the ingredients are quite simple
- 3 1/2 c flour plus a little extra
- 1 1/2 c room-temperature water, filtered
- 1 c active sourdough starter
- 2 tsp salt
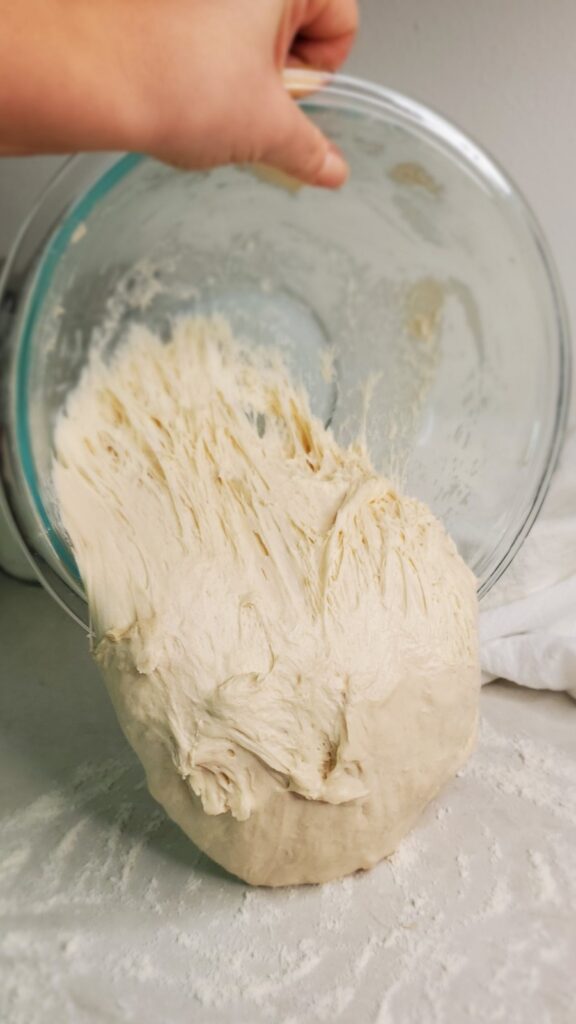
1. In a mixing bowl, add the water, starter, flour, and salt in that order and mix thoroughly. Cover with a damp tea towel or plastic wrap and set aside for 30 minutes.
2. After 30 minutes with damp hands give the dough a simple stretch and fold right in the bowl by lifting the dough up from one edge and down towards the center, working in a circle around the bowl until you have worked all the dough back into a tight ball. Cover and let rest for 5 hours or until it has doubled in size. You can do up to 4 stretch and folds with 20-30 minutes of rest in between each one before the 5-hour rise. I have always done one stretch and fold for this recipe for time’s sake and ease. Stretch and folds help give strength to the gluten.
3. Once the dough is double in size and slightly jiggly, turn the dough onto a lightly floured surface. Gently work the dough out with your hands into a rectangle shape. Then fold it over itself in threes and shape and roll it up into a ball. You can cup your hands around the edge opposite side of the dough from you and drag it across the counter towards yourself, letting it roll into a tight ball, giving the top of the loaf some tension.
4. If you don’t have a sourdough banneton basket like me, take a clean tea towel, generously flour it, and place the floured tea towel inside a bowl with taller edges. I also flour the top of the sourdough before putting it into the bowl, with the smooth side down to help keep it from sticking to the towel.
5. Cover with a damp kitchen towel or cling wrap and place in the refrigerator overnight. You can leave it in the refrigerator for up to 36 hours.
6. The next day, take the loaf out of the refrigerator and immediately turn the sourdough loaf out carefully onto parchment paper. (Crinkling the parchment paper ahead of time will help it lay flat.)
7. Preheat your oven to 450 degrees. While the oven heats up lightly flour the top of the loaf and score in your design. (rice flour works best for this, but I use all-purpose) Use a lame to cut a pattern into the top. You can use string to mark out your pattern to follow your blade across, or you can eyeball it too. Other tools that work for designs are kitchen scissors, kabob sticks to poke little holes, or a sharp new razor blade if you don’t have a lame. Scoring helps the way your bread rises in the oven. Not scoring it can result in the loaf braking and might affect the look, and texture. It may also result in unwanted bulges and blowouts in your loaf. Scoring creates a weak point in the dough where water in the form of steam can escape. You need one primary cut, that will be the largest and deepest opening you make. The rest is pretty much decorative.
8. Gently pick up the parchment paper with the sourdough and place it in a Dutch oven. I put mine in a cold Dutch oven, some chose to heat the Dutch oven beforehand. This is a personal choice.
9. Bake for 40 minutes, remove the Dutch oven lid, and bake for an additional 10 minutes.
10. Let the loaf cool for a minimum of 2 hours before you slice into it. The starches are still in the process of setting and cutting bread too soon can result in a gummy and uneven texture.
This keeps around 3 days before it can start going moldy, so I like to keep mine in the refrigerator to help keep it fresh for as long as possible. You can also store it in the freezer. Preslicing it makes it easier to pop a frozen slice out and toast it up whenever you want a slice.
Storing sourdough bread:
Homemade bread does not keep long sitting out. It starts drying out the moment you slice into it.
You can keep sourdough bread at room temperature for 2-3 days. However, I have heard that if you keep sourdough bread in a bread box, it can last up to 5-7 days. I don’t have a bread box to test this out though.
I like to keep my sourdough bread in the refrigerator for up to a week, or if I want to store it longer, I will pre-slice it and keep it in the freezer. You can toast frozen slices in the toaster or leave the bread out beforehand to thaw.
Make sure the sourdough loaf is completely cool before placing in a platic bread bag, any extra moisture can result in mold quickly.
Basic Sourdough Bread
Ingredients
- 3 1/2 c flour
- 1 1/12 c water room temperature filtered
- 1 c active sourdough starter
- 2 tsp sea salt
Instructions
- In a mixing bowl, add the water, starter, flour, and salt and mix everything until combined. Cover with a damp tea towel or plastic wrap and set aside for 30 minutes.
- 2. After 30 minutes uncover and wet your hands to begin lifting the dough up and down towards the center working in a circle around the bowl until you have worked all the dough back into a tight ball. Cover again and let rest 5 hours or until double.
- 3. Once the dough is double in size and slightly jiggly, turn it out onto a lightly floured surface. Using your hands, work the dough into a rectangle shape, fold it over itself in threes, and shape and roll it into a ball. You can cup your hands around the edge of the loaf on the opposite side of you and drag it across the counter towards you, creating tension in the top of the loaf. (You don't want it to tear, just create tension)
- 4. If you don’t have a sourdough baton, use a clean tea towel, generously flour it, and place the floured towel inside a mixing bowl with taller edges. I also flour the top of the sourdough before putting it into the towel-lined bowl with the smooth side down to help keep it from sticking to the towel.
- 5. Cover with a damp kitchen towel or cling wrap and place in the refrigerator overnight. You can leave it in the refrigerator for up to 36 hours.
- The next day, turn the sourdough loaf out carefully onto parchment paper and preheat your oven to 450 degrees.
- While the oven heats up, lightly flour the top of the loaf and score in your design. (rice flour works best for this, but I use all-purpose) Use a lame to cut a pattern into the top. You can use string to mark out your pattern, or you can eyeball it. Other tools that work for designs are kitchen scissors, kabob sticks to poke little holes, or a sharp new razor blade if you don’t have a lame. Scoring helps the way your bread rises in the oven. Not scoring your loaf can result in the loaf breaking and might affect the look, and texture of your bread. It may also result in unwanted bulges and blowouts in your loaf. Scoring creates a weak point in the dough where water in the form of steam can escape. You need one primary cut, this needs to be the largest and deepest opening you make. The rest is pretty much decorative.
- Gently pick up the parchment paper with the sourdough and place it in a Dutch oven. I put mine in a cold Dutch oven, some chose to heat the Dutch oven beforehand. This is a personal choice.
- Bake for 40 minutes, remove the Dutch oven lid, and bake for an additional 10 minutes.
- Let the loaf cool for a minimum of 2 hours before you slice into it. The starches are still in the process of setting and cutting bread too soon can result in a gummy and uneven texture.
- You can store your bread in a bread bag. I like to keep mine in the refrigerator for up to a week, or in the freezer for longer. You can keep it on the counter, but since there are no preservatives, it can dry out quickly.


How long do you bake it for? I see to preheat the oven, but no other instructions after that. Do you preheat with a Dutch oven inside? Looks delicious!
Hello Melanie,
Thank you for bringing this to my attention, so I can fix that on my post.
To answer your question, I don’t preheat my dutch oven. I place the dough in my dutch oven while it’s cold and then bake it in the preheated oven for 40 minutes.\
Then I remove the lid and bake an additional 10 minutes.
Thank you! – Katie
My starter is on day 7 and it formed an orange-ish skin on most of the top. Is that mold?
Hello Bonnie,
I apologize for missing your message. I receive many spam messages, which makes it difficult for me to respond to everyone in a timely manner. An orange layer of skin on top of a sourdough starter is a sign that it has gotten too much bad bacteria in it, and should be thrown out. I had this happen to me once with a sourdough starter that I called March a few years ago. It was a starter I had made before my no-discard starter. It had been going for well over a year, and I am not sure what caused it to happen. It does happen, unfortunately. I am curious, are you in a warm or humid climate? It happened during the summer for me, and it gets very humid here. I possibly got behind on feeding it before the bad bacteria took over. I now keep my starters in the refrigerator to help slow down the fermentation process.